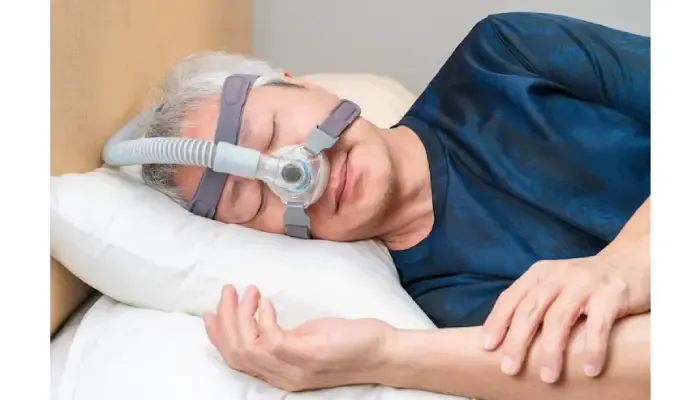
An at-home sleep apnea test (HSAT) is a convenient way to assess for obstructive sleep apnea. First, consult your doctor about your symptoms like loud snoring or daytime fatigue. If OSA is suspected, you’ll receive a prescription for the test. Next, obtain the equipment and familiarize yourself with its setup. On testing night, securely attach sensors that monitor airflow, chest movements, and blood oxygen levels. Stick to your normal bedtime routine and avoid stimulants like caffeine. Sleep comfortably while the device collects data for 4-6 hours. Finally, review the results with your healthcare provider to discuss potential treatments or further evaluations!
Overview of At-Home Sleep Apnea Tests
At-home sleep apnea tests (HSAT) are a convenient way to diagnose obstructive sleep apnea (OSA) right from the comfort of your own bed. These user-friendly devices monitor crucial aspects of your sleep, such as breathing patterns, oxygen levels, and heart rate. This means you can relax and sleep as you normally would, making the process less intimidating compared to traditional in-lab studies. Plus, HSATs are often more affordable, typically costing between $100 and $500, making them accessible to many. They are particularly suitable for individuals who exhibit symptoms of moderate to severe OSA, like loud snoring or excessive daytime sleepiness. However, it’s important to note that while HSATs are effective, they might not provide a complete picture of all sleep-related disorders. Make sure to familiarize yourself with the device to ensure accurate results, as it empowers you to take control of your sleep health. The quick turnaround of results not only aids in faster diagnosis but also helps you start a potential treatment plan sooner.

Consult with Your Doctor
Before diving into an at-home sleep apnea test, it’s crucial to consult with your doctor. Start by preparing a list of symptoms you experience, like loud snoring or persistent fatigue. This information helps your doctor understand your situation better. Additionally, don’t forget to share any family history of sleep disorders or related health issues, as this can influence your risk factors. During your visit, your doctor may perform a physical exam to assess your throat and neck, which can reveal important clues about potential blockages. Be ready to answer questions about your sleep habits and lifestyle, as these details are vital for an accurate assessment. It’s also a great time to ask about the different types of sleep tests available, and inquire about any potential risks or limitations of an at-home test compared to in-lab testing. Understanding why a home sleep test might be recommended over an in-lab study is essential for making informed decisions. If you have any concerns about the testing process, don’t hesitate to express them. Finally, clarify how the results will be interpreted and used, and make sure to follow up with your doctor on the next steps after you receive your test results. This proactive approach can set the stage for better sleep health!
Obtain a Prescription for the Test
To get started with your at-home sleep apnea test, you’ll need a prescription from a doctor. This is usually a requirement, as it ensures that the test is appropriate for your situation. If you prefer convenience, consider using telemedicine services, which allow you to consult with a doctor online. Before moving forward, check with your insurance to see if they cover the cost of the home test, as this can save you a significant amount. It’s also important to understand the difference between home tests and more comprehensive lab studies, so you know what to expect. Some companies now offer a direct-to-consumer model for home sleep apnea tests, which can simplify the process even further. Keep in mind any medical conditions you have that may affect your eligibility for the test. Once you’ve received your prescription, confirm the type of device you will be using, as different tests may utilize different equipment. Don’t forget to ask your doctor about the duration of the prescription and whether it will need to be renewed. Lastly, always keep a copy of the prescription for your records, just in case you need it later.
Receive the Sleep Test Equipment
When your sleep test kit arrives, it can come through the mail or you might pick it up at a local clinic. Before diving in, take a moment to inspect the package for any signs of damage. Once you’ve ensured everything looks good, open it up and familiarize yourself with all the components inside. This kit usually includes sensors, batteries, and possibly charging cables, so make sure you know what each item is for. Read through any user manuals or instructions carefully, as they will guide you on how to set up and use the equipment effectively. If you have any questions or uncertainties, don’t hesitate to reach out to customer support for assistance. Before the testing night, check that all parts are functioning properly and find a comfortable, private spot where you can set up the equipment. Lastly, note the return address and any shipping instructions to ensure a smooth return process. Handle the testing equipment with care, keeping track of everything so that it’s ready for your important night ahead.
Set Up the Testing Equipment
Setting up your sleep apnea testing equipment is crucial for getting accurate results, so follow the instructions step-by-step. First, lay out all the components where you can easily access them. This includes the nasal cannula, chest band, pulse oximeter, and microphone. Before attaching anything, clean the areas on your body where the sensors will stick, as this helps them adhere better. Next, securely attach the nasal cannula to measure airflow accurately, and position the chest band comfortably around your ribcage to monitor your breathing efforts. Make sure the pulse oximeter is snugly placed on your finger to get a precise reading of your oxygen levels. The microphone should be positioned well to capture any snoring sounds effectively. After everything is in place, double-check all the connections to minimize the risk of sensors coming loose during the night. It’s a good idea to practice putting on the device ahead of time so you feel comfortable with it. If you have any questions, don’t hesitate to review the setup process with a family member or friend for extra support.
Prepare for the Night of Testing
Getting ready for your at-home sleep apnea test is crucial for accurate results and a good night’s sleep. Start by sticking to a relaxing bedtime routine, which can help promote better sleep quality. On the night of your test, make sure to avoid heavy meals, caffeine, and alcohol, as these can disrupt your sleep. Check that the testing device is fully charged to last through the night, so you can sleep soundly without interruptions.
Create a comfortable sleeping environment by adjusting the lighting and temperature to your preference. Wear loose, comfortable clothing to ensure that the sensors stay in place without causing any discomfort. If you need extra support, consider using additional pillows to help you find a cozy position. Aim to go to bed at your usual time to keep your sleep schedule consistent, which can aid in obtaining reliable data.
To calm your mind before sleep, try relaxation techniques such as deep breathing or gentle stretches. Lastly, keep your phone or alarm clock out of reach to minimize distractions and promote a peaceful atmosphere. Be prepared for potential interruptions during the night, and have a plan to handle them, ensuring you can focus on getting the rest you need.
Conduct the Sleep Test
To conduct your sleep test, start by turning on the device according to the instructions just before you head to bed. It’s crucial to aim for at least 4 to 6 hours of sleep to collect enough data for analysis. Try to sleep in your usual position, as this will provide the most accurate results. If you find yourself waking up during the night, resist the urge to remove any sensors, as doing so could disrupt the data collection. Create a quiet and dark environment to enhance your sleep quality, and avoid checking the time frequently, which can lead to unnecessary anxiety. If you experience any discomfort, feel free to adjust the sensors to ensure they fit comfortably. Staying calm and relaxed is key; it will help you fall back asleep more easily. Be aware of any unusual sensations from the equipment, and if needed, consider using a sleep mask or earplugs to block out distractions.
Complete the Test and Return Equipment
Upon waking, the first step is to turn off the device carefully, following the provided instructions. This ensures no damage occurs to the equipment. Next, gently remove the sensors, taking care to avoid any skin irritation or damage. Always check that all components are accounted for before returning them, as missing parts can delay the process. Follow the return instructions that came with the equipment, these often include details on how to pack the device securely to prevent any damage during shipping. Sending back the equipment as soon as possible is crucial, as it helps expedite the results. It’s wise to keep a record of your return tracking number for reference, should any issues arise. Don’t hesitate to inquire about the timeline for when you can expect your results, and confirm if there’s a need for follow-up appointments after returning the equipment. Lastly, store any documentation related to the test for future reference, as it may be helpful in discussions with your healthcare provider.
Analyze the Results of the Test
Once you have completed your at-home sleep apnea test, it’s time to dive into the results. Your doctor will review crucial data such as your oxygen levels and breathing patterns. This information is vital as it may indicate the severity of sleep apnea, if present. Expect your doctor to discuss potential treatment options based on these findings, which could include lifestyle changes or therapies like continuous positive airway pressure (CPAP) to help you breathe better at night.
Don’t hesitate to ask for clarification on any terms or metrics in the report. Understanding the details can empower you to take control of your sleep health. You might also want to explore how lifestyle adjustments, such as weight loss or changing sleep positions, could enhance your sleep quality. If your results suggest the need for further evaluation or testing, your doctor will guide you through the next steps.
Additionally, inquire about support resources available to help you manage sleep apnea effectively. This could include educational materials or support groups. Finally, be sure to schedule follow-up appointments to monitor your progress and the efficacy of your treatment. Staying proactive about your sleep health is key to improving your overall well-being.
Measurements Collected During the Test
During an at-home sleep apnea test, various measurements are collected to help assess your sleep quality and identify any apnea events. Breathing patterns are tracked using airflow sensors and respiratory effort sensors, which monitor how well you are breathing throughout the night. Additionally, a pulse oximeter measures your oxygen saturation levels and heart rate, providing critical data on how well oxygen is delivered to your body while you sleep.
Snoring frequency and intensity are recorded with built-in microphones, capturing those sounds that may indicate disruptions in your breathing. Some devices even analyze your body position during sleep, allowing for a comprehensive view of how your posture affects your breathing. Furthermore, many home devices monitor movements throughout the night, giving insight into how active or restless you are while sleeping.
The data collected helps your doctor assess the severity of sleep apnea and understand how these measurements correlate with your symptoms, such as excessive daytime sleepiness or difficulty concentrating. After the test, your results may be presented in graphs or charts, making it easier to visualize the patterns in your sleep. Discussing these findings with your healthcare provider is crucial as it can lead to tailored treatment options that fit your specific needs.
Benefits of At-Home Sleep Studies
At-home sleep studies offer incredible advantages for those seeking answers about their sleep health. First and foremost, the convenience of conducting the test in your own bedroom allows you to relax in a familiar environment. This comfort can make a significant difference in how well you sleep, ultimately leading to more accurate results. Additionally, at-home tests are cost-effective, typically ranging from $100 to $500, which makes them accessible to a wider audience compared to traditional lab studies.
Quick results are another highlight, as many individuals receive their findings within just a few days, speeding up the diagnosis and treatment process. The minimal disruption to your sleep routine is also a major benefit, letting you stick to your usual patterns without the constraints of a clinical setting.
User-friendly equipment designed for easy setup ensures that even those who are not tech-savvy can operate the devices with confidence. Plus, increased privacy is a significant draw; you can perform the test without the presence of medical staff, making the experience less intimidating.
Flexibility is key, as you can schedule the test whenever it suits you, choosing a night when you feel most comfortable. Since the test allows for natural sleep behavior, it can lead to more accurate readings of your sleep patterns and apnea events, which is crucial for those who suspect they have moderate to severe obstructive sleep apnea (OSA). Overall, these benefits make at-home sleep studies an appealing option for many.
- Convenience of conducting the test in your own bedroom, allowing for a comfortable and familiar environment.
- Cost-effective solution, typically ranging from $100 to $500, making it accessible for many individuals.
- Quick results, often available within a few days, enabling faster diagnosis and treatment.
- Minimal disruption to your sleep routine, as you can follow your usual patterns without the constraints of a lab setting.
- User-friendly equipment designed for easy setup and operation, making the process straightforward for patients.
- Increased privacy, as you can perform the test without the presence of medical staff in a clinical setting.
- Flexibility in scheduling the test at your convenience, allowing you to choose a night when you feel most comfortable.
- Less intimidating than in-lab tests, reducing anxiety and stress associated with sleep studies.
- Allows for natural sleep behavior, potentially leading to more accurate readings of your sleep patterns and apnea events.
- Useful for individuals with a strong suspicion of moderate to severe OSA, providing crucial data for diagnosis.
Limitations of At-Home Sleep Studies
At-home sleep studies can seem like a convenient option, but they come with several limitations that are important to consider. Firstly, these tests are not as comprehensive as in-lab studies. They miss crucial elements like brain activity measurement, which is essential for diagnosing more complex sleep disorders. Moreover, there is a risk of errors during data collection; sensors can easily become dislodged or malfunction without the oversight of healthcare professionals. This can lead to inaccurate results, especially when it comes to assessing the severity of sleep apnea, as home tests often rely on simplified calculation methods. Additionally, these tests may not effectively identify other sleep disorders that can occur alongside sleep apnea, such as restless leg syndrome or insomnia. They are also not suitable for patients with complex medical histories or multiple sleep disorders, limiting their applicability. Another challenge is the reliance on self-reporting for symptoms and sleep habits, which may introduce bias or lead to incomplete data. Furthermore, limited support from healthcare providers during the test can cause confusion or improper equipment use, making troubleshooting difficult if issues arise. Variability among devices and testing protocols also raises concerns about the consistency and reliability of results. Finally, it is often necessary to follow up with in-lab testing for a complete assessment, which can delay the diagnosis process.
Resource URL: